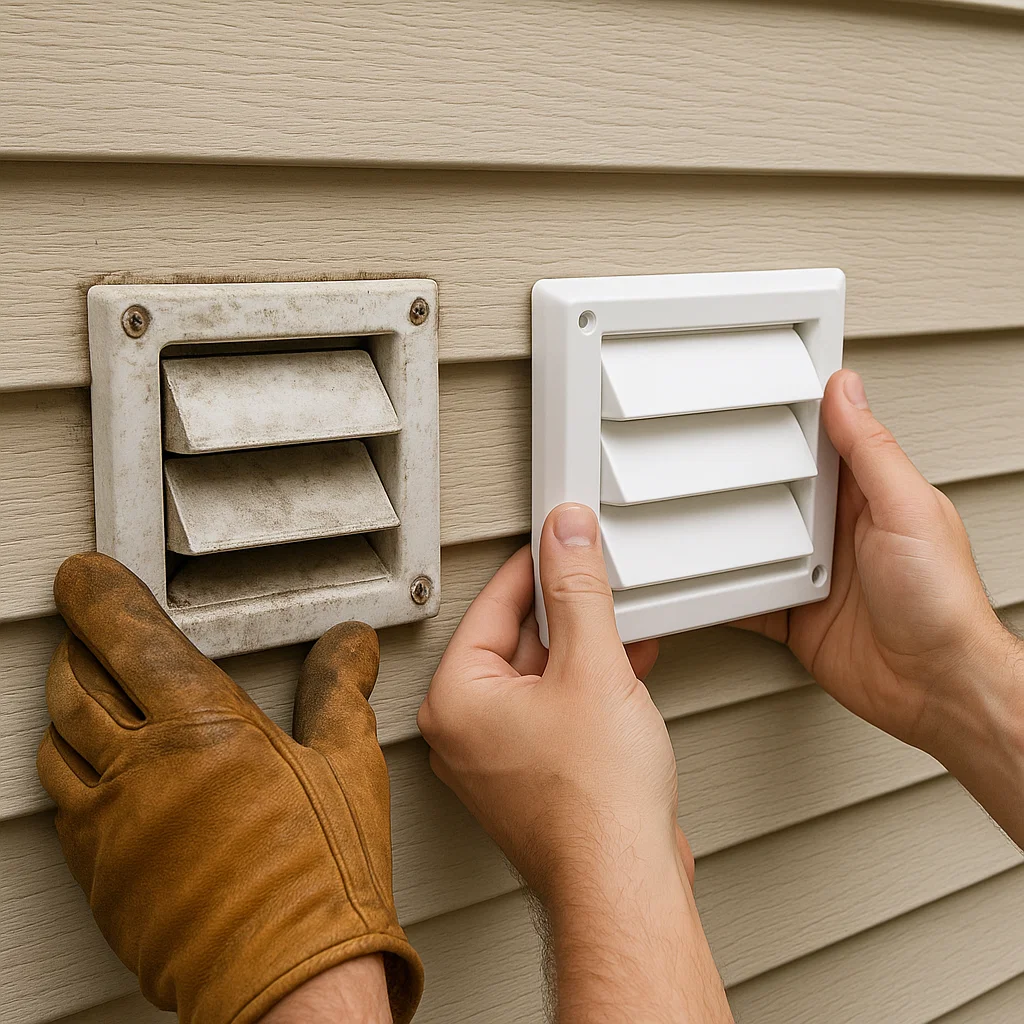
If you live in sunny Chula Vista and just realized your dryer vent cover is falling apart, don’t worry—you’re not alone. Whether it’s wear and tear, bird nests, or just age, a broken vent cover can sneak up on anyone. The good news? Replacing it is usually a quick and simple job. But how long does it actually take?
Let’s walk through everything you need to know about Dryer Vent Cover Replacement.
So, How Much Time Should You Set Aside?
The short answer: anywhere from 30 minutes to 2 hours, depending on a few key factors. If you’re doing it yourself and have all the tools ready, it can be pretty quick. If you’re calling in a professional, they’ll likely knock it out even faster—provided there are no major surprises hiding behind that old cover.
Here’s a quick breakdown:
| Task | Estimated Time |
|---|---|
| Basic replacement (no complications) | 30–45 minutes |
| Minor repairs around vent | 1–1.5 hours |
| Professional installation | 30–60 minutes |
| DIY with no experience | 1.5–2 hours |
As you can see, it’s not an all-day affair. Just make sure to carve out a window where you’re not rushing—especially if you’re going the DIY route.
What Can Affect the Timeline?
Now let’s talk real-world stuff. Sometimes things don’t go exactly by the book. Here are a few common factors that might make the job take longer than expected:
1. Location of the Vent
If your dryer vent is on a first-floor wall that’s easy to reach, the job is smooth sailing. But if it’s on a second story, behind bushes, or on the roof (yep, that happens), you’ll need extra time—and maybe even a ladder or a pro.
2. Type of Cover You’re Installing
Some vent covers snap right into place, while others need to be screwed in, sealed, or even customized. Heavy-duty metal covers with pest guards take more time than a basic plastic flap.
3. Condition of the Vent Itself
Sometimes what looks like a simple cover replacement turns into a mini repair job. Mold, clogged lint, or water damage can slow you down. Plus, if critters like birds or squirrels have moved in, you’ll need to evict them safely before doing anything else.
4. DIY vs. Pro Help
Chula Vista has a lot of skilled handymen and vent cleaning services. If you’re hiring someone, they’ll usually have the tools and experience to wrap it up in under an hour. Doing it yourself? Allow a little extra time for trial and error (and maybe a trip to Home Depot).
Why Replacing Your Dryer Vent Cover Matters (More Than You Think)
It’s tempting to put this job off. The cover’s just cosmetic, right? Wrong. A damaged or missing dryer vent cover can lead to bigger (and more expensive) issues down the road.
Here’s what a good vent cover helps prevent:
- Lint buildup – which can cause fires
- Critter invasions – like birds, rats, and insects
- Moisture entry – which can lead to mold
- Energy waste – poor sealing can mess with dryer efficiency
“A simple vent cover swap can save you hundreds in future repairs,” says local technician Miguel R., who’s been fixing appliances in Chula Vista for over 12 years. “It’s one of the smallest jobs that can have a big impact.”
Safety & Cost Breakdown
Replacing a dryer vent cover is a low-risk task if done carefully—but there are still a few things to keep in mind, especially when working on ladders or with sharp tools. Here’s a quick overview:
| Key Feature | Details |
|---|---|
| Safety Level | Low (basic tools, low risk) |
| Tools Needed | Screwdriver, sealant, gloves, ladder (maybe) |
| Cost (DIY) | $15–$40 for materials |
| Cost (Pro Help) | $75–$150 (includes parts and labor) |
| Ideal Timeframe | Within a day of noticing damage |
FAQs
Q1: Can I replace the dryer vent cover myself?
Absolutely! If you’re comfortable with basic tools, it’s a beginner-friendly project. Just make sure you buy the right size cover and seal any gaps properly.
Q2: What’s the best time of year to replace it?
Dry, sunny days are ideal—good thing Chula Vista has plenty of those. Avoid doing it during heavy wind or rain.
Q3: How do I know it needs replacing?
Look for cracks, missing flaps, rust, or if you feel cold air or smell mold near your dryer vent. These are clear signs it’s time for a replacement.
Q4: Should I clean the vent before replacing the cover?
Yes! Cleaning out lint buildup before installing the new cover improves airflow and reduces fire risk. Consider a professional dryer vent cleaning service if it’s been a while.
Q5: Are there pest-proof vent covers?
Yes! Many modern covers come with built-in screens or pest guards to keep animals and insects out. They take slightly more time to install but are totally worth it.
Final Thoughts: A Small Fix That Pays Off
Dryer vent cover replacement in Chula Vista doesn’t have to be a big deal. Most people can get it done in under an hour, especially with the right tools and a little prep. Whether you’re into DIY or prefer to let a local expert handle it, the key is not to delay. That little cover plays a bigger role in your home’s safety and energy efficiency than you might think.
So next time you pass by the side of your house and see a wonky, cracked, or missing vent cover—take action. Your dryer (and wallet) will thank you later.
And remember, Dryer Vent Cover Replacement is one of those small maintenance wins that can make your home safer, cleaner, and more efficient.
Read More: Dryer Vent Cleaning