
Getting your new HP LaserJet Enterprise 507dn up and running doesn’t have to be complicated. This enterprise-grade monochrome laser printer promises exceptional performance, lightning-fast print speeds, and professional-quality output for your business. However, proper setup is crucial to unlock its full potential. This detailed guide provides everything you need to know about HP LaserJet Enterprise 507dn printer setup, from initial unpacking to your first successful print job.
Understanding Your HP LaserJet Enterprise 507dn
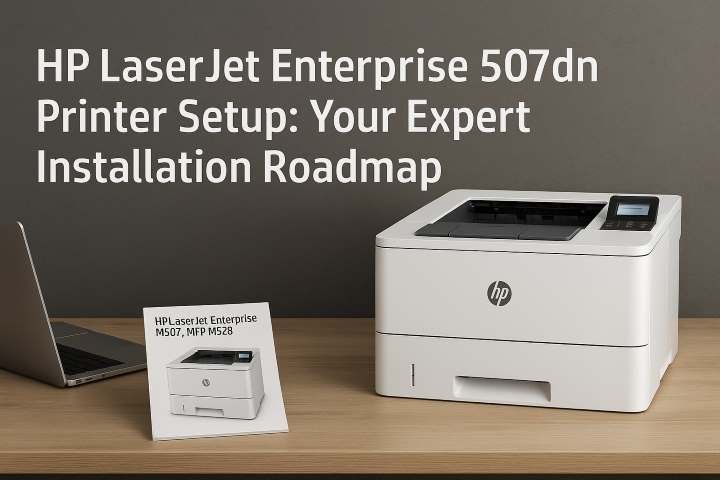
The HP LaserJet Enterprise 507dn stands out as a powerhouse in the business printing world. Designed for workgroups and small-to medium-sized offices, this printer delivers impressive speeds of 45 pages per minute with automatic two-sided printing. Its robust paper handling capacity, advanced security features, and reliable performance make it an investment worth setting up correctly from day one.
Preparing Your Workspace for Installation
Before beginning your HP LaserJet Enterprise 507dn printer setup, proper preparation saves time and prevents issues. Choose a location with adequate ventilation and a stable, level surface that can support the printer’s weight. Ensure you have easy access to the rear panel for cable connections and sufficient clearance around all sides for paper loading and maintenance.
Position your printer near an electrical outlet and network connection point. Avoid locations with extreme temperature fluctuations, direct sunlight, or high humidity, as these conditions can affect print quality and component longevity. Keep the printer away from air conditioning vents or heaters that might blow dust into the internal mechanisms.
Careful Unboxing and Inspection
Begin your HP LaserJet Enterprise 507dn printer setup by carefully removing the device from its packaging. The printer ships securely packed, so take your time removing all cardboard inserts, protective tapes, and foam padding. Check both the exterior and interior compartments for orange shipping locks or protective materials that must be removed before operation.
Inspect the printer for any shipping damage. Examine the control panel, paper trays, and exterior surfaces. Open all access doors and trays to ensure nothing is broken or loose. If you discover damage, document it with photographs before contacting HP support or your vendor. Save all packaging materials until you’ve successfully completed setup and printed test pages.
Toner Cartridge Installation Process
The HP LaserJet Enterprise 507dn requires toner cartridge installation before it can print. Locate the toner cartridge included with your printer. The 507dn typically ships with a starter cartridge that provides fewer pages than standard replacement cartridges but is sufficient for initial setup and testing.
Open the front access door by pressing the release button. The door swings down, revealing the toner cavity with helpful installation diagrams. Remove the toner cartridge from its sealed bag, keeping it horizontal to prevent toner spillage. Grasp both ends of the cartridge and gently shake it five to six times from side to side. This distributes the toner powder evenly inside the cartridge for optimal print quality.
Locate the orange pull tab on the cartridge and firmly pull it completely out in one smooth motion. This removes the protective seal that prevents toner from dispersing during shipping. Align the cartridge with the guides inside the printer and slide it in firmly until it clicks and locks into position. Close the front door securely. The printer will recognize the new cartridge automatically.
Powering Up Your Printer
Connect the power cable to the port on the rear panel of your HP LaserJet Enterprise 507dn, then plug the other end into a surge-protected outlet. Avoid using extension cords when possible, as they can cause power fluctuations that affect printer performance.
Press the power button located on the control panel. The printer begins its initialization sequence, which takes approximately two to three minutes on first startup. During this time, you’ll hear mechanical sounds as the printer calibrates its components and prepares the fuser assembly. The control panel display shows various status messages throughout this process. Wait patiently until the display shows “Ready” before proceeding to the next step.
Loading Paper Correctly
Proper paper loading prevents jams and ensures consistent print quality. Pull out the main input tray completely from the front of the printer. You’ll see adjustable guides for both paper width and length. These blue or green guides slide to accommodate different paper sizes.
For standard letter-sized paper, adjust the guides to the 8.5 x 11-inch markings. Load a stack of clean, unwrinkled paper into the tray with the print side facing down. Fan the paper before loading to separate the sheets and prevent multiple sheets from feeding simultaneously. Don’t exceed the maximum capacity line marked inside the tray, typically around 550 sheets.
Slide the loaded tray back into the printer until it locks into place. The control panel may prompt you to confirm the paper size and type. Use the navigation buttons to select the correct specifications, then press OK. Accurate paper settings ensure proper fuser temperature and optimal print quality.
Establishing Network Connectivity
For shared office printing, network connection is essential for your HP LaserJet Enterprise 507dn printer setup. The 507dn model features a built-in Gigabit Ethernet port for fast, reliable network communication.
Locate the Ethernet port on the rear panel, usually marked with a network icon. Connect a high-quality Ethernet cable from this port to an available port on your network switch or router. Use at least Cat5e cable for optimal performance. Once connected, the printer automatically attempts to obtain an IP address from your network’s DHCP server.
To verify network connectivity and obtain your printer’s IP address, access the control panel menu. Navigate to Network Settings or Print Configuration Page, depending on your firmware version. The configuration page lists crucial information, including IP address, subnet mask, gateway, and MAC address. Record the IP address, as you’ll need it for driver installation on connected computers.
For networks without DHCP, you can manually assign a static IP address through the control panel menu. Consult your network administrator for appropriate IP settings that won’t conflict with other devices on your network.
Windows Driver Installation
Computers need proper drivers to communicate with your HP LaserJet Enterprise 507dn. For Windows users, begin by visiting HP’s official support website. Enter “LaserJet Enterprise 507dn” in the search box and navigate to the drivers section. Download the full feature software package compatible with your Windows version.
Run the downloaded installer with administrator privileges. The installation wizard guides you through the process. When prompted to select a connection type, choose “Network” or “Wired Network.” The installer searches your network for available HP printers. Select your HP LaserJet Enterprise 507dn from the discovered devices list. If your printer doesn’t appear, you can manually enter its IP address.
The installer copies necessary files and configures print settings. This process takes several minutes. Upon completion, the wizard offers to print a test page. Accept this option to verify successful installation. The installer also installs HP Printer Assistant, a utility for managing printer settings, checking supply levels, and running maintenance routines.
Mac Driver Installation
Mac users experience a streamlined HP LaserJet Enterprise 507dn printer setup process. Click the Apple menu and select System Preferences, then click Printers & Scanners. Click the plus button below the printer list to add a new device.
Your Mac scans the network and displays available printers. Select the HP LaserJet Enterprise 507dn when it appears. macOS includes built-in AirPrint drivers that provide basic printing functionality. For advanced features, download HP’s Mac driver package from their support website before adding the printer.
Select the appropriate driver from the “Use” dropdown menu. If you installed HP’s driver, choose it from the list. Click Add to complete the installation. Your Mac automatically configures the printer and sets it as an available printing destination.
Configuring Advanced Settings
Access your printer’s embedded web server for advanced configuration by entering its IP address into any web browser. This web interface provides access to security settings, default preferences, email notifications, and firmware updates.
Consider enabling these important features: automatic duplex printing to reduce paper consumption, quiet mode for noise reduction in shared spaces, and PIN printing for confidential document security. Set up email alerts to notify you when toner runs low or when paper jams occur, allowing proactive maintenance.
Review security settings carefully. Enable secure protocols like SNMPv3 and disable unused services. If your office handles sensitive information, configure IPsec or 802.1X authentication to prevent unauthorized network access to your printer.
Printing Your First Test Page
Verify successful HP LaserJet Enterprise 507dn printer setup by printing from a connected computer. Open any document or webpage and access the print dialog. Select your HP LaserJet Enterprise 507dn from the printer list. Review print settings, then click Print.
The document should print within seconds with crisp, clear text and sharp graphics. If the test page doesn’t print or shows quality issues, consult the troubleshooting section of your quick start guide. Common solutions include reseating the toner cartridge, checking cable connections, and verifying driver installation.
Optimizing Performance and Maintenance
Regular maintenance keeps your printer performing optimally. Replace toner cartridges when print quality degrades or when the control panel alerts you. Clean the printer interior monthly using compressed air to remove dust and paper particles. Update firmware periodically through the embedded web server to access the latest features and security patches.
Monitor the printer’s page count and schedule professional maintenance at recommended intervals. The HP LaserJet Enterprise 507dn is designed for high-volume printing but benefits from periodic professional cleaning and component inspection.
Conclusion
Completing your HP LaserJet Enterprise 507dn printer setup correctly ensures years of reliable, professional printing. By following these comprehensive steps, you’ve established a solid foundation for your office printing needs. This robust enterprise printer now stands ready to deliver fast, high-quality output while supporting your business productivity goals. With proper setup, configuration, and maintenance, your HP LaserJet Enterprise 507dn will prove to be an invaluable asset to your workplace.